Group editor#
In the group editor, you can visually configure the behavior of virtual users during the execution of tests.
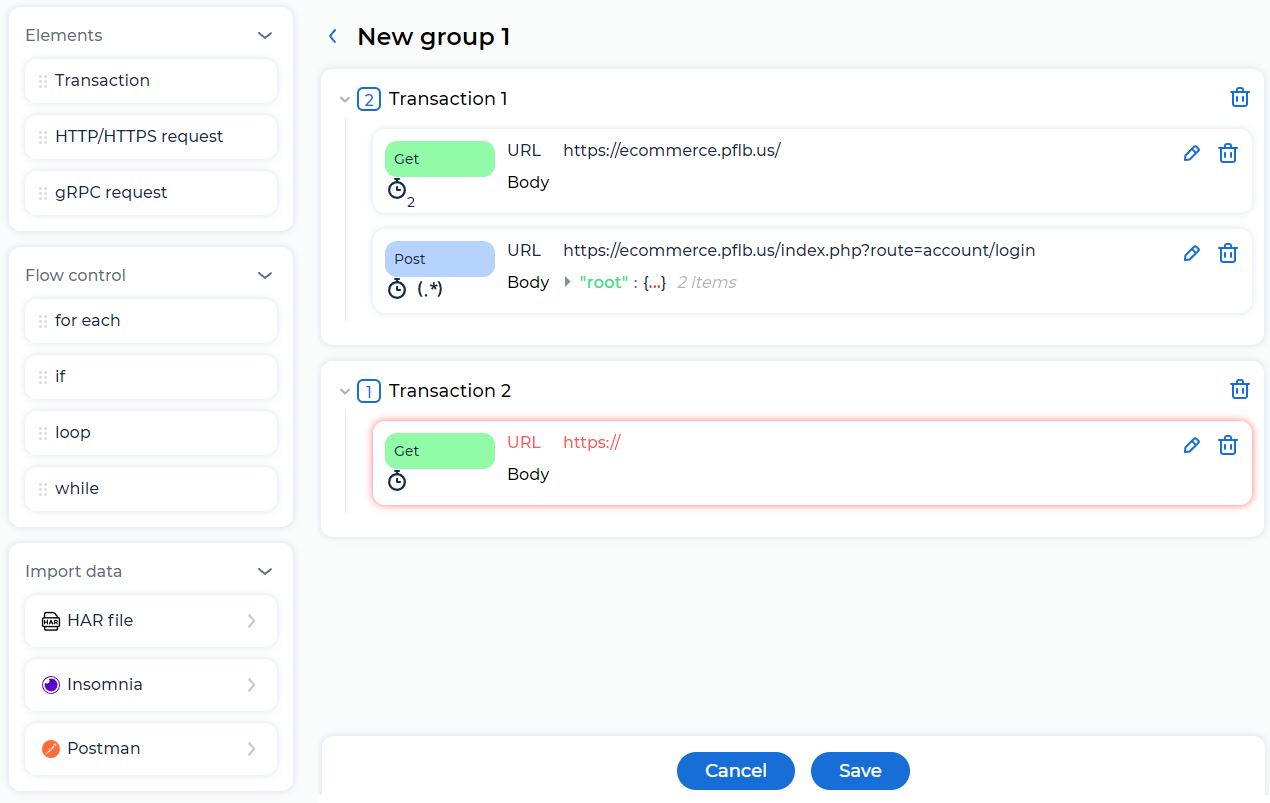
In the editor, you can create a logical scenario to emulate a business process or send RESTful API requests. Use Drag & Drop to:
add to the group:
transactions;
flow control elements, such as conditions and cycles;
change the order of the elements in the group.
You can use standard and custom JMeter functions in queries and logic elements.
For transactions and flow control elements, the number of nested elements is displayed, for example,  .
.
Information for requests is displayed when the cursor hovers over the icons:
 –
–  –
– Edit requests#
Go to the request or click
 .
.Edit HTTP request or gRPC request.
If you specify an incorrect URL or don’t specify the URL in the request and click Save for the group, the request is highlighted red and the group isn’t saved.
Add flow control elements#
for each#
The for each element loops through the values of the input variable and sends nested requests. Each subsequent value of the input variable affects the output variable.
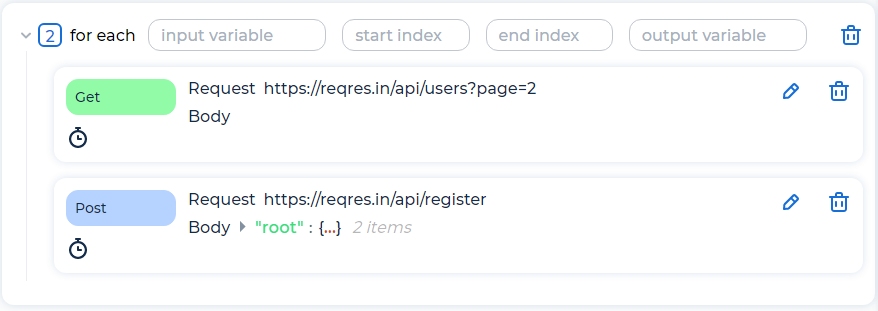
Parameters of the for each element:
input variable. Name of the input variable specified in the
myInputVariableformat. Don’t use${myInputVariable}and special symbols.start index. Start index for loop over variables. The first element is at start index + 1.
end index. End index for loop over variables.
output variable. Name of the output variable specified in the
myOutputVariableformat. Don’t use${myOutputVariable}and special symbols.
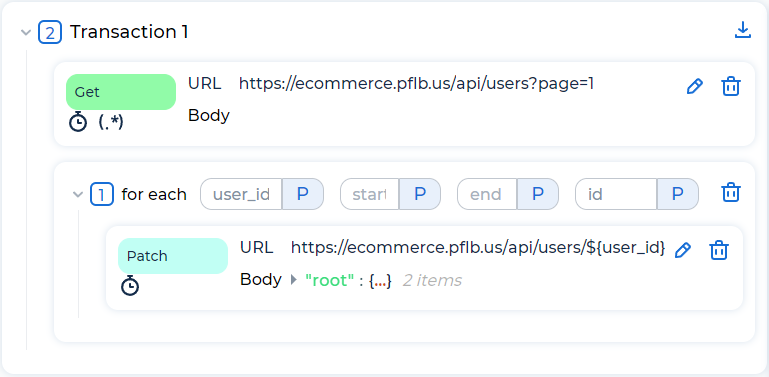
Example of using the for each element:
Update information about online store users:
The first request gets a list of users:
{
   "page": 1,
   "data": [
      {
         "id": 1,
         "email": "michael.lawson@mycompany.org",
         "first_name": "Michael",
         "last_name": "Lawson"
      },
      {
         "id": 2,
         "email": "lindsay.ferguson@mycompany.org",
         "first_name": "Lindsay",
         "last_name": "Ferguson"
      },
      {
         "id": 3,
         "email": "tobias.funke@mycompany.org",
         "first_name": "Tobias",
         "last_name": "Funke"
      }
   ]
}
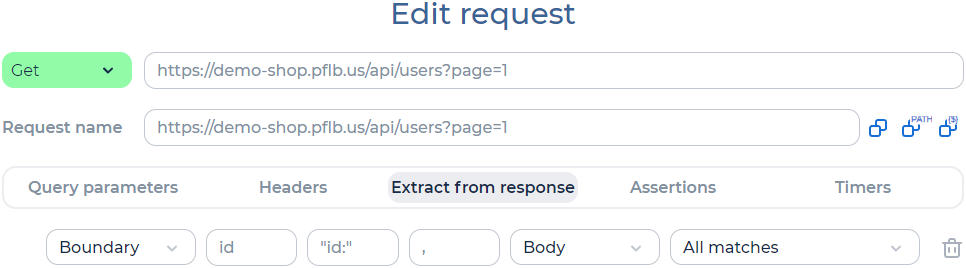
Extract from the response all matches for the user ID, for example, using boundaries:
The for each element loops through the user IDs and update information about users:
if#
The if element sets conditions for executing nested requests.
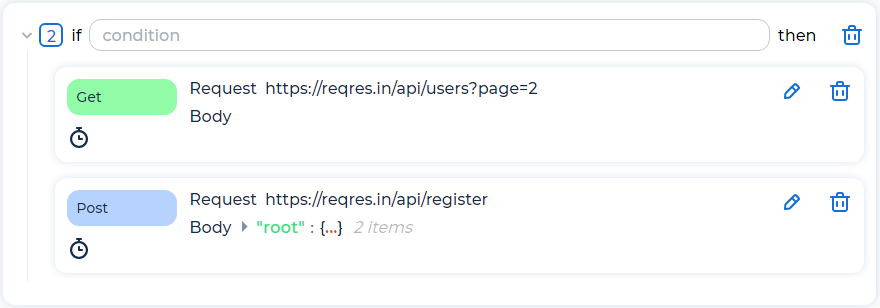
Parameter of the if element:
condition. Nested requests will be sent, if the condition is true. A condition can be a variable or a function that returns true or false. Use __groovy functions, for example:
${__groovy(vars.get("myVar") != "Invalid" )}
${__groovy(vars.get("myInt").toInteger() <=4 )}
${__groovy(!${path}.equals("25"))}
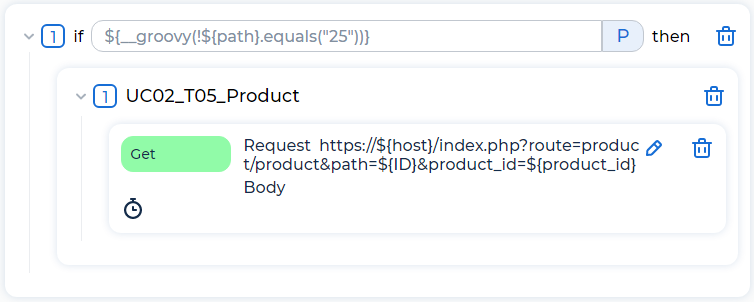
Example of using the if element:
Get item data if the product category ID is “25”:
loop#
The loop element runs nested logic for a predefined number of iterations.
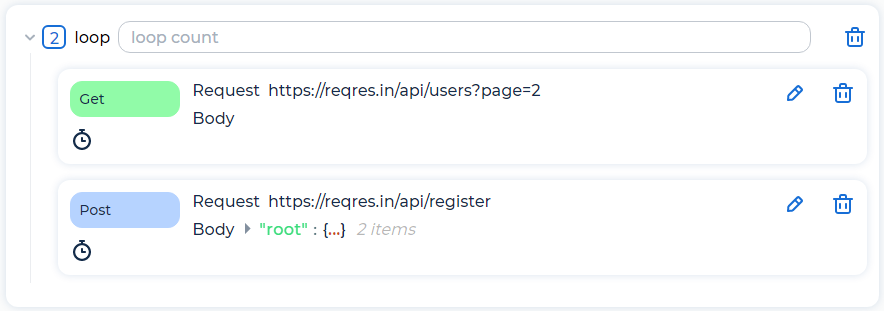
Parameter of the loop element:
loop count. Number of loop iterations. It can be a static number or a variable. If the value is -1, the loop runs indefinitely within the limits specified in the load profile.
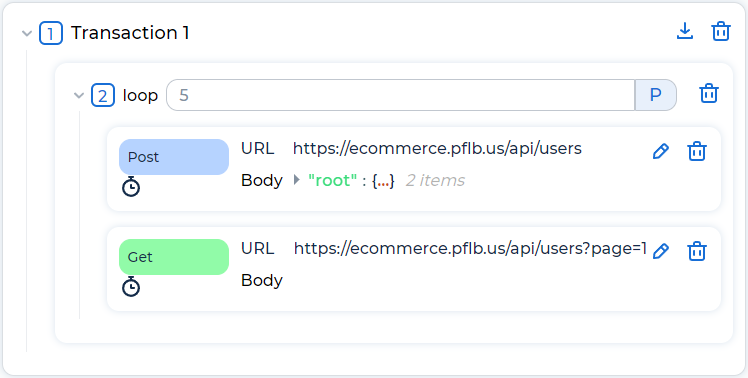
Example of using the loop element:
Send 5 HTTP requests to create users, and then send a request 1 time to get a list of users:
while#
The while element runs nested flow control elements until the condition is “false”. The condition is evaluated twice, once before executing the elements below it, and once at end of nested execution. The while element is used when it’s impossible to define the exact number of iterations of the loop.
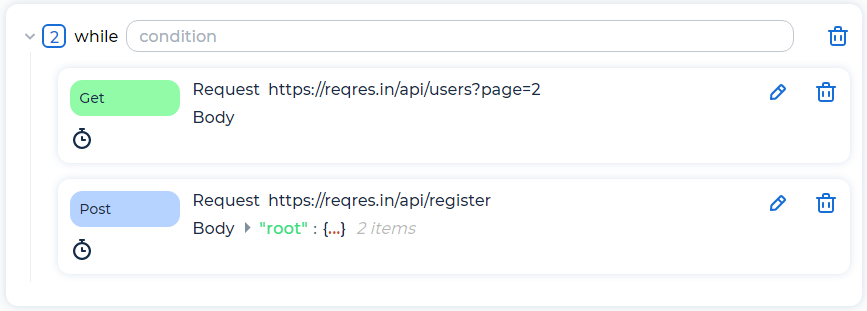
Parameters of the while element:
condition. Possible condition values:
Blank. Exit loop when last sample in loop fails.
LAST. Exit loop when last sample in loop fails. If the last request just before the loop failed, don’t enter the loop.
Condition. Nested requests will be sent, if the condition is equal to the string “false”. Use __groovy functions, for example:
${__groovy(!"${myvariable}".equals("FINISHED"))}
${__groovy(${counter}<=5)}
${__V(login_${count})} != "NotFound"
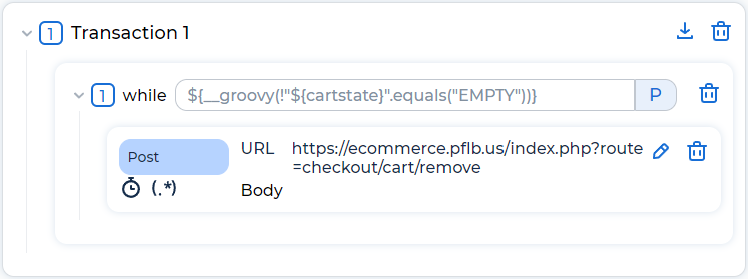
Example of using the while element:
Delete items from the cart until the cart becomes empty:
Rename elements#
To rename a group or transactions, click on the name of the element and change it.
Delete elements#
To delete a group, transaction or request, click  .
.
To delete all groups, follow these steps:
Return to the Thread groups tab.
Click Actions ⋮ and select Delete all groups.