Create teams and manage users#
Teams and permissions are used for collaboration between testers with tests:
Each team works with its own tests.
A user can be a member of several teams and navigate between them. But at a time the user works with tests of one team.
A user can have different permission in each team he has access to. For example, Run in one team, and View in the others.
Permissions#
Permissions define actions that users can perform on PFLB Platform:
Team owner gives the user permission to change the team settings, view, edit, and run tests, and manage registered users.
View gives the user permission to view tests, testing results, trend reports, and settings sets.
Edit gives the user permission to edit tests, trend reports, and settings sets.
Run gives the user permission to run projects.
Manage users gives the user permission to add users to the teams, edit permissions for team members, and delete users.
Edit permissions when you add a new team member.
Note
Only a team owner can grant the Team owner permission to users.
Create team#
To create a team, follow these steps:
In the upper-right corner of the window, click team’s name. For example,
 . The window opens:
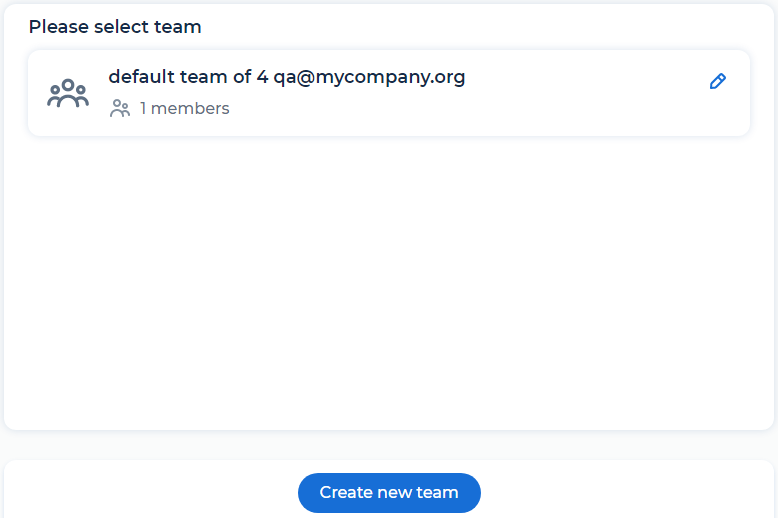
Click Create new team. The window opens:
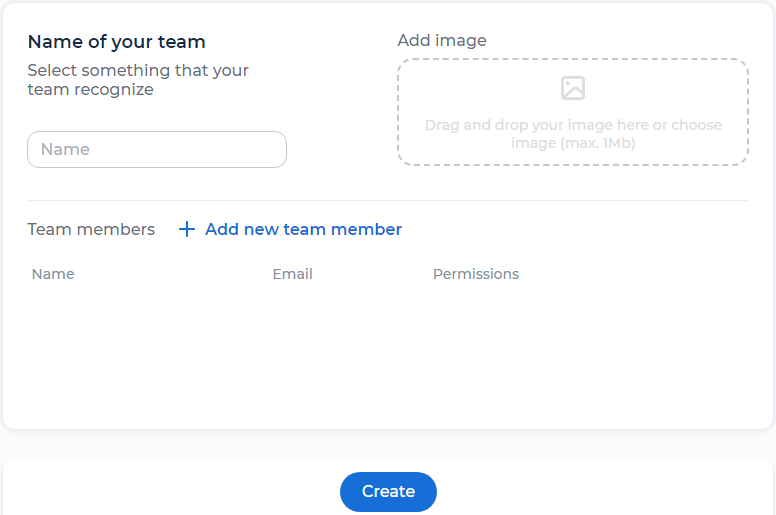
In the Name field, enter the name of your team.
Add an image for your team if needed. The image lets you highlight a team in the list.
Click Create.
The team page displays the list of users:
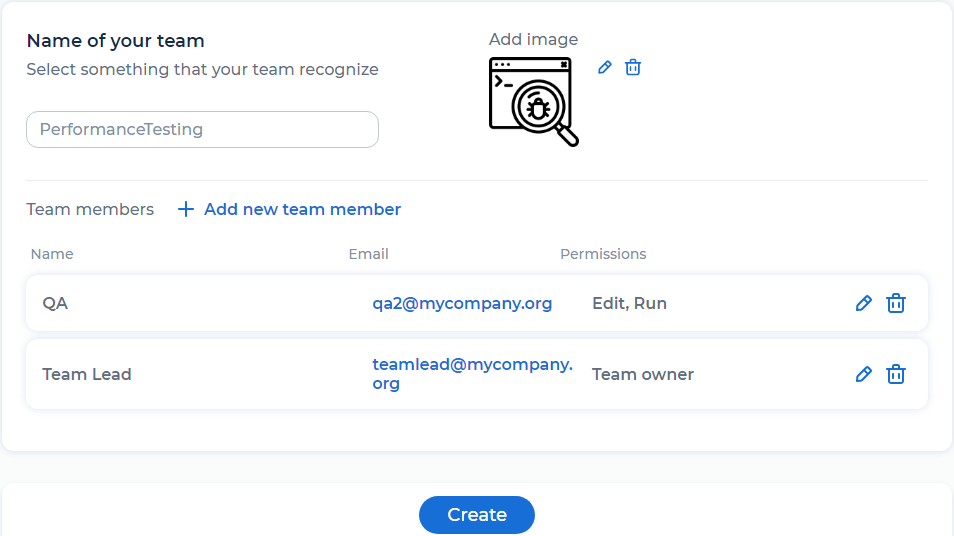
Add team members#
Users with the Team owner and Manage users permissions can add users to created teams.
To add user to a team, follow these steps:
In the upper-right corner of the window, click + Select team. The window opens:
Click
 Edit team next to the team.
Click + Add new team member. Member settings appear:
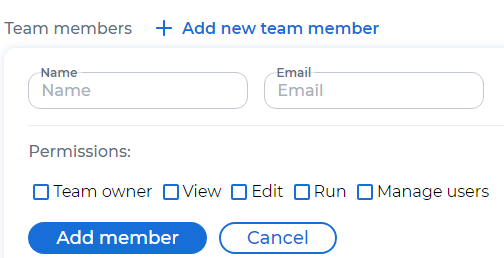
Enter the user’s name and email.
Note
The user’s name can be specified only when adding a user. It isn’t possible to change it later.
To manage user access, select required checkboxes.
Click Add member. The user automatically receives an email with a link to activate the account to the specified email.
If the added users have signed up to PFLB Platform previously, they get access to the team’s tests, test runs, trend reports, and settings sets.
If the added users haven’t signed up to PFLB Platform, they need to activate their account to work with the team’s tests. The user has to click the link received automatically by email.
The team page displays the button to refresh an invite link for an inactive user:

Delete team members#
Users with the Team owner and Manage users permissions can delete users from teams.
To delete a team member, follow these steps:
In the upper-right corner of the window, click on the team’s name. For example,
.Click
Edit team next to the team.Click
 next to the user.
Note
The last user with the Team owner permission can’t be removed from the team. To delete this user, grant the Team owner permission to another user and try again.
Invite users#
After having been added to the team, the user automatically receives an email invite link. The invite link expires in 24 hours.
If the user doesn’t activate the account within 24 hours, request another email invite link:
In the upper-right corner of the window, click + Select team or the team’s name. For example,
.Click
Edit team next to the team.Click
 Refresh and copy invite link next to the added user.
Send the link to the user.
Select the team#
A user can be a member of several teams.
To create a team, follow these steps:
In the upper-right corner of the window, click on the team’s name. For example,
. The Teams page opens.Click on the team’s name in which you are to start or continue working with PFLB Platform.
Edit the team settings#
Team owners can change the team’s name or image.
To edit the team settings, follow these steps:
In the upper-right corner of the window, click the team’s name. For example,
.Click
Edit team next to the team.Change the team’s name or image.
Click Save on the bottom of the page.
Change permissions#
Users with the Team owner and Manage users permissions can change the team members’s permissions.
To change the permissions, follow these steps:
In the upper-right corner of the window, click the team’s name. For example,
.Click
Edit team next to the team.Click
next to the user. Member settings appear: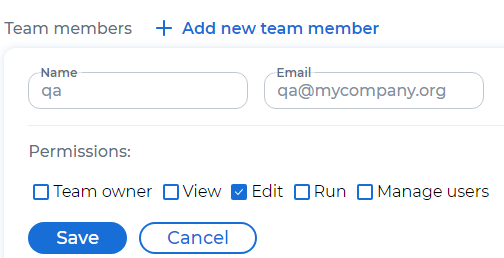
Select or clear checkboxes for the permissions that need to be given to the user or taken away from them.
Click Save.